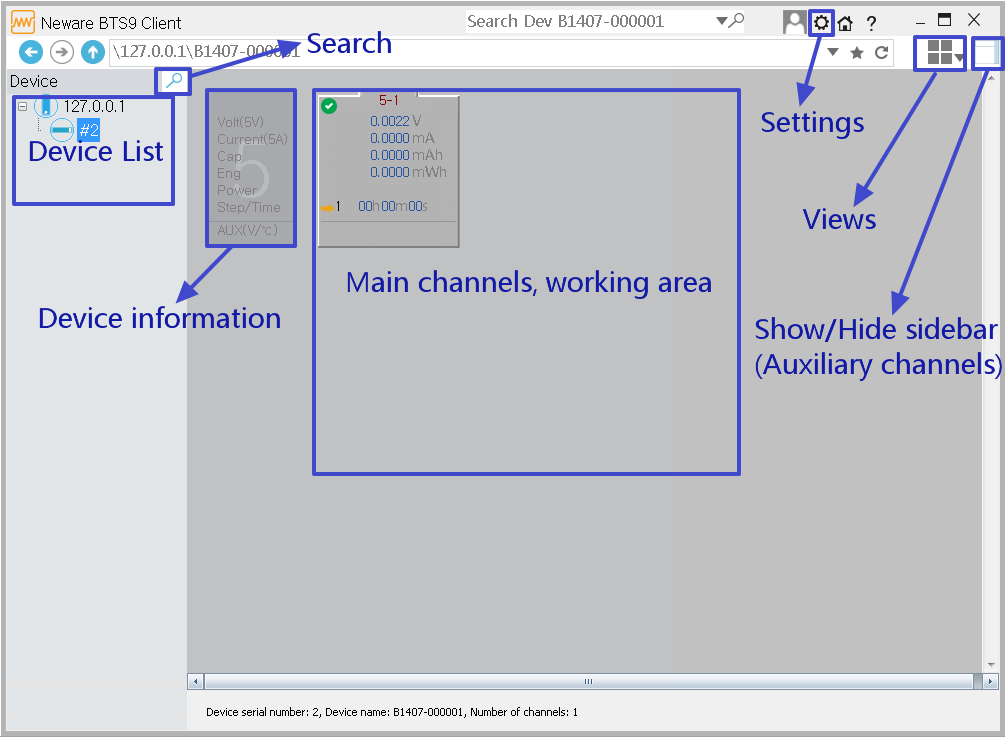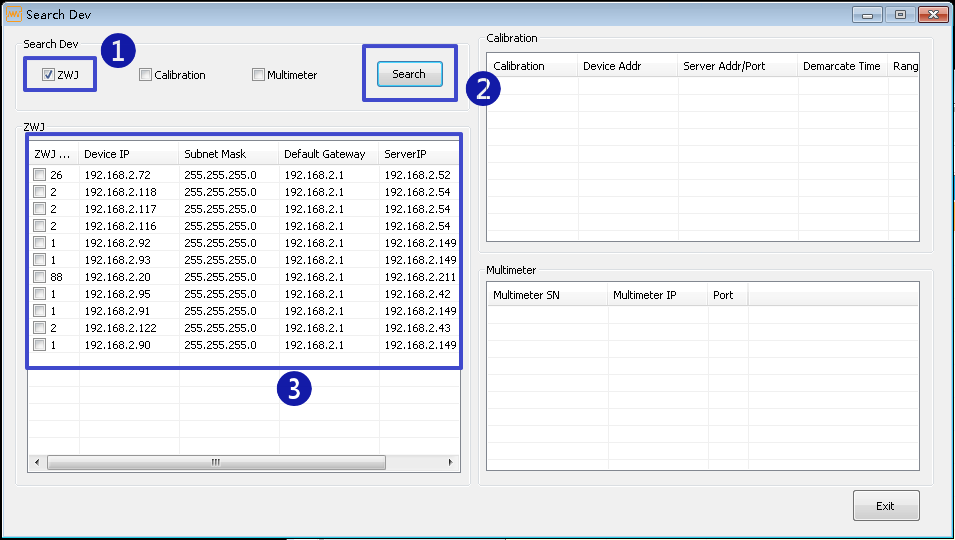
Click the “Search” button(looks like a magnifier) on the left corner of the Client software, in the popup “search device” window, follow the step 1, 2, 3 in the following picture(check zwj, hit the search button), and normally, you will see the search result list).

In most cases, you’ll find more than one devices. In BTS9000, each channel will be recognized as one separated device. So if you bought a BTS9000 with 4 channels, you’ll notice there are 4 devices in the search result list. You can operate each channel separately.
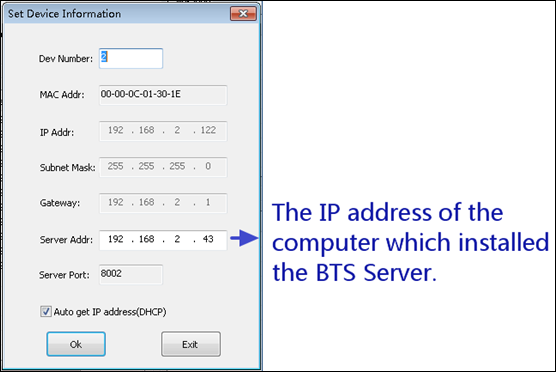
Choose one of the device you want to connect with your computer, double click on it, and you will have this popup window. In most cases, you only have to set up the “Server Address” of the machine, of course, before doing this, you should get the IP address of the computer that the BTS9000 is going to connect with.

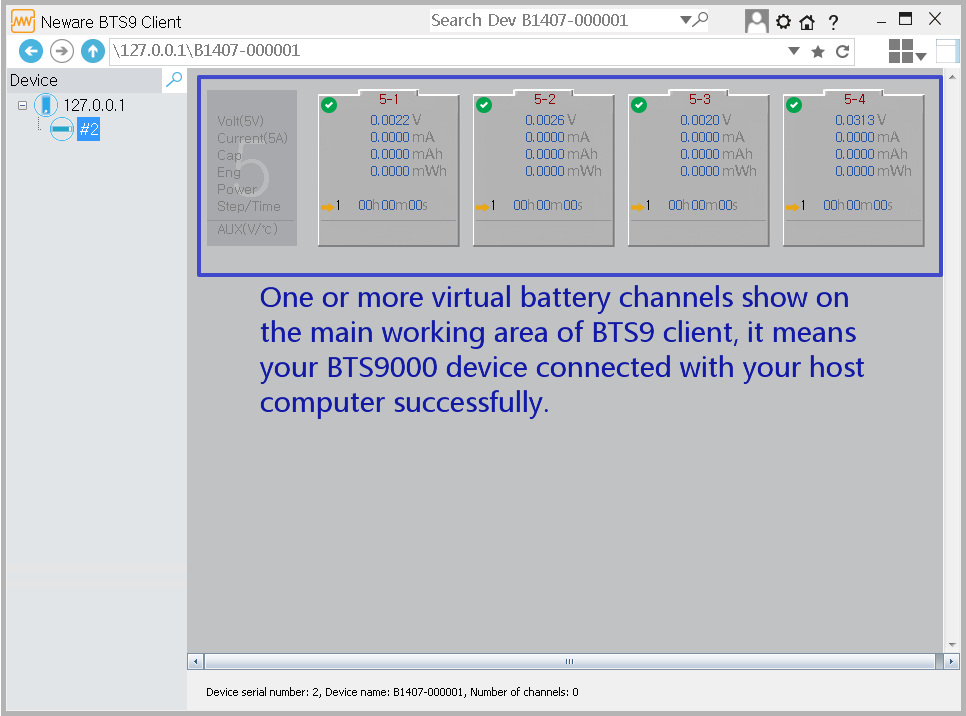
The Server Address is the IP address of the computer which installed the BTS Server(if you installed BTS Software Server and Client on different computers, then the BTS Server IP Address and BTS Client IP Address are different, please note this.) Input the Server IP address and click ok, return to the window of the BTS Client. Now you’ll see the virtual channels in the main working area, just as the following picture shows, if you can see that, it means your BTS9000 connects with your computer successfully.

From now on, you are ready to perform the battery tests.
