How to set the C-Rate function in Neware BTS8.0
If the "C-Rate" mode unable in the Neware BTS8.0, follow blow steps to enable it.
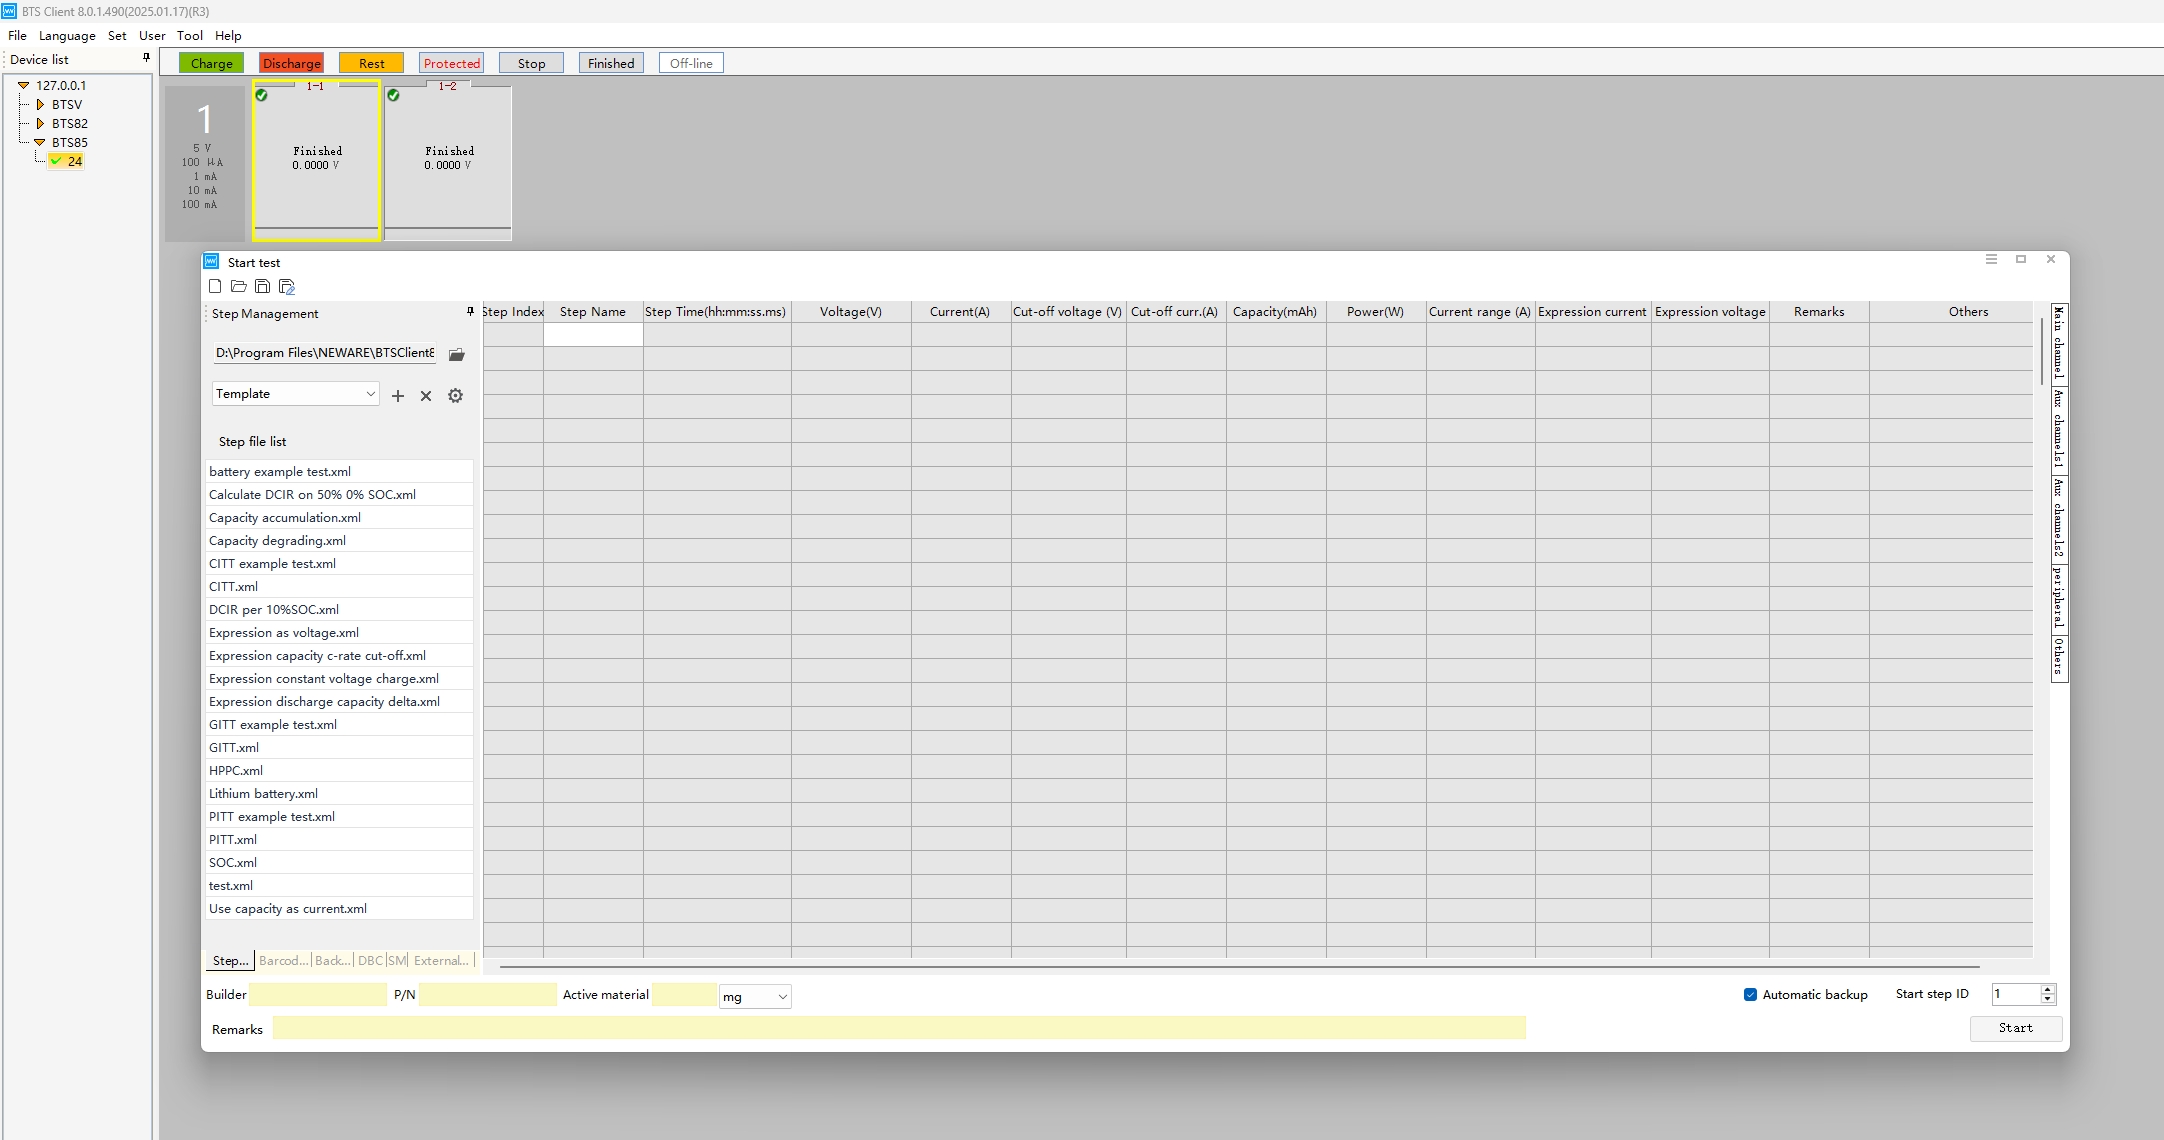
No "C-Rate" checkbox in the BTS 8.0 software.
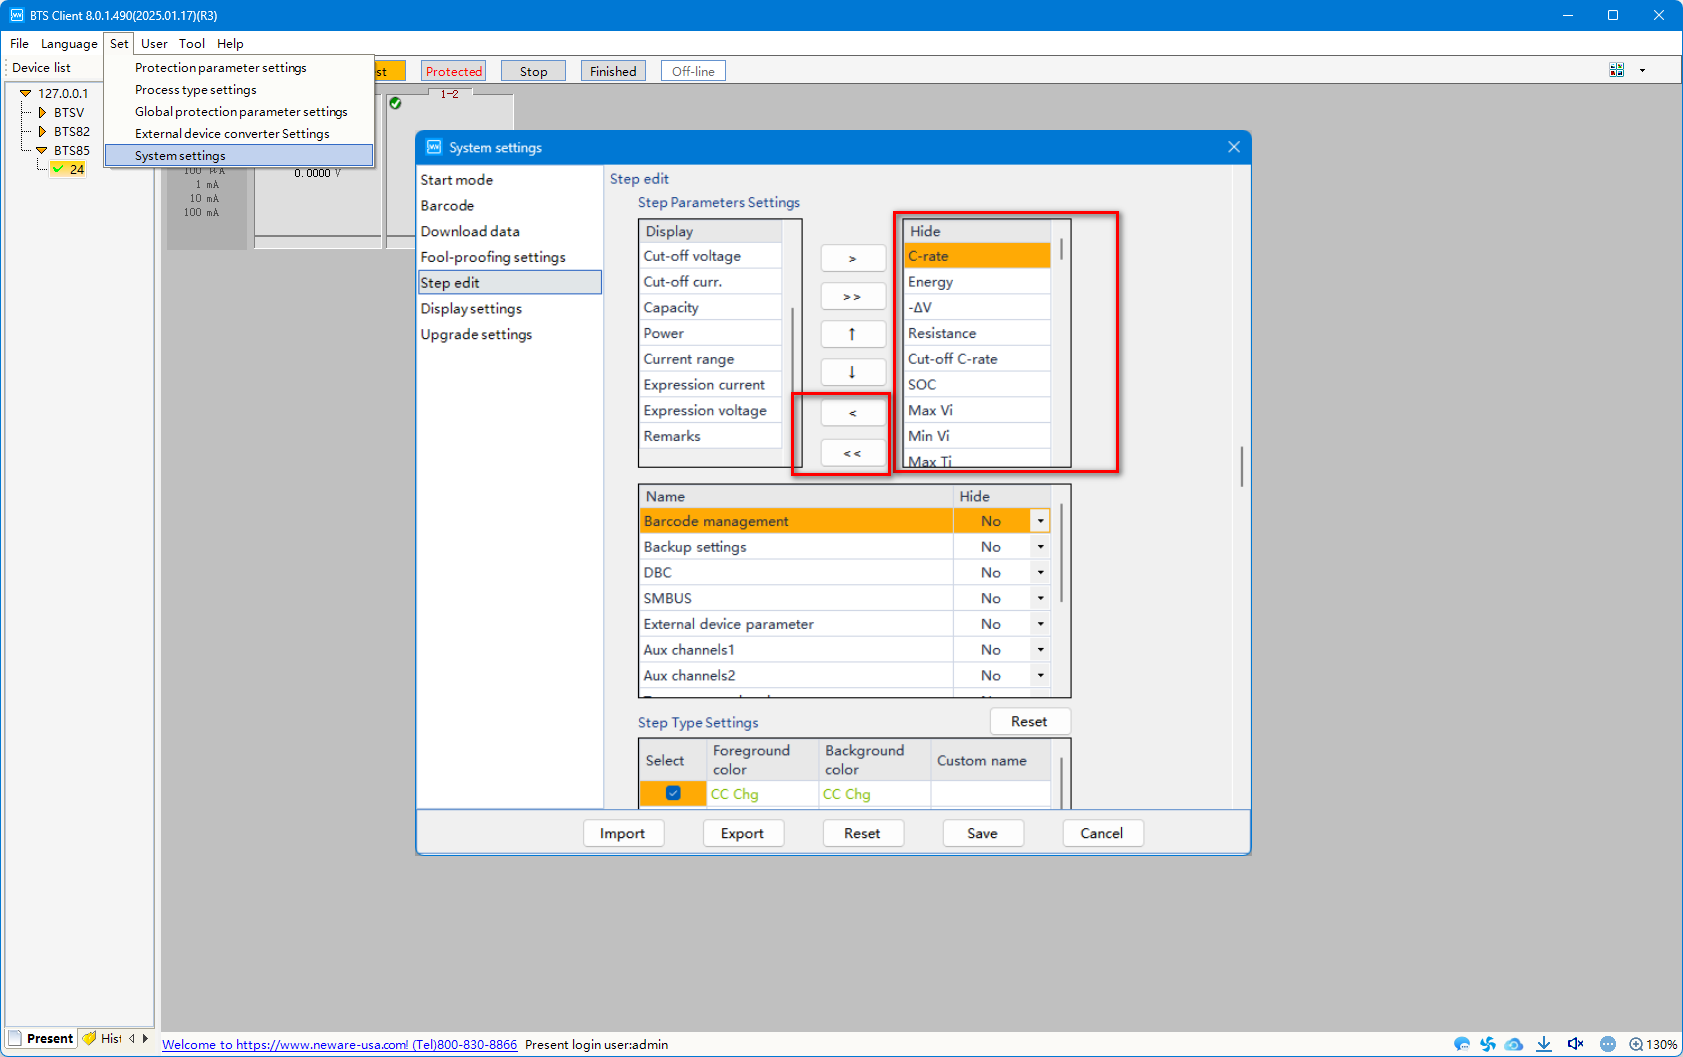
Back to the menu bad on the left of software. Click the "Set"-"System Settings"-"Step edit". Select the "C-rate" and "Cut-off C-rate", use the left arrow let these two parameter move to the left box, then enable the C-rate mode.
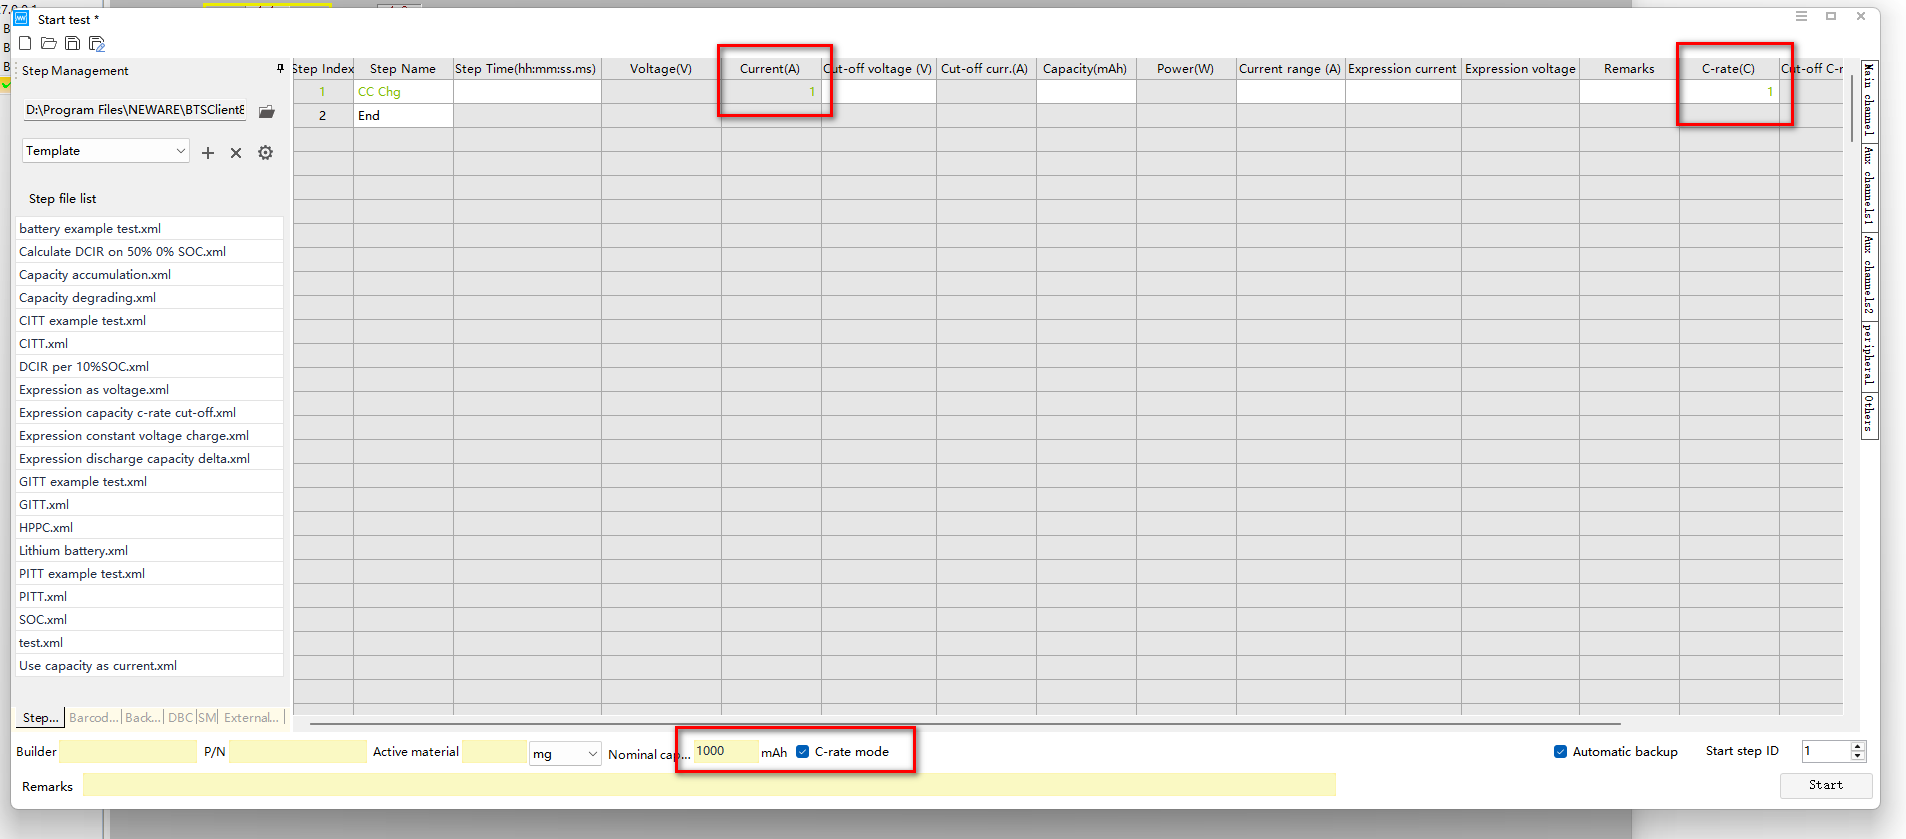
Make sure the "C-rate" mode has been selected correctly. There are two modes of C-Rate. One is "Nominal capacity", another mode is "Nominal specific capacity".

Right click on channel to single start, again. The "C-rate" checkbox was shown and default checked. User can preset the capacity, then input the number in the blank to start rthe C-rate test.
Whole operation process as below.
This email address is being protected from spambots. You need JavaScript enabled to view it.
![]()
How to modify Tester Unit ID?
If you received the same Unit ID for different tester as below, you have to use our tool to change its unit ID. Follow below steps:

-Open “Tool”-“Calibration” on menu bar.


-Right click on the “Main” tester you want to change , choose “Modify the configuration of the tester”.

In this interface you can modify the machine ID if you have same ID for machine (Main tester and Auxiliary tester)

After changed, click “Modify” button, and restart the control unit and tester to enable the change.
This email address is being protected from spambots. You need JavaScript enabled to view it.
![]()
How to modify Auxiliary Tester ID, change temperature type, and load the temperature comparison table?
1. Modify Auxiliary Tester ID
-Open “Tool”-“Calibration” on menu bar.

-Right click on the “Auxiliary”, choose “Modify the configuration of the tester”.

In this interface you can modify the machine ID if you have same ID for machine (Main tester and Auxiliary tester)

2. Change the temperature type
-You can change the Auxiliary tester type by clicking different choose box.
After checked, the pop-up window will shown up, inform you the confirmation.

Click “OK” to the next.
After you see the message, the modification is complete, you have to restart the tester.(Including the control unit and tester)

3. Load the temperature comparison table
If your auxiliary tester can not read the temperature value correctly. Please load the comparison table as below:
- Load the thermocouple temperature comparison table. Load the T type or K type thermocouple temperature comparison table.

- After loaded the table, a pop-up window shows the loading process complete.

- After click “OK” button, another pop-up window will show up, please click “OK” button, then choose the “2K-3976RT.txt” thermistor file to load.

- After load the file, a pop-up window shows the process completed.

- Restart the aux tester and check the temperature value.
This email address is being protected from spambots. You need JavaScript enabled to view it.
![]()
How to use the Backup settings in BTS8.0?
Backup setting is more important setting to help you save your test data. Complete the backup setting make sure test data safety saved.
Before you setting the backup, ensure the automatic backup setting is default checked.
Set--Download data---Automatic backup

You will find the the checkbox on the front of “Automatic backup” is grey, can not be checked.

Otherwise, the checkbox need to be checked manually.

Backup settings information

Backup Directory: Chose “...” more option to select the backup path.
Remote Directory: Chose “...” more option to select the backup path. Support IP address input. Like online drive, onedrive or others.
File name:
User can select name type of file for the export data file.
Default: User can check it in “Set--System settings---Download data
- Barcode: User select it as file name.
- Bath: User select it as file name.
- Customize: Select customize file name. User click the “customize” button, a customize name window will pop up. User can select the parameter as they need.

- Is create folder by remarks: Folder created by remarks.
- Is create folder by begin time: Folder created by beginning time.
File format:
NDA: Neware original data. User can view all data in it.
EXCEL: User have to click “Report” button to select the parameter as they need in EXCEL format file.

CSV: User have to click “Report” button to select the parameter as they need in CSV format file.

Backup type:
Scheduled backup: User can input different time to do the scheduled backup. We suggest user can keep it in default.
Fixed time backup: User can input time in this blank let the system backup in fixed time.
Idle backup: Default checked. System will automatic backup when computer under idle time. We suggest not to uncheck it.
All steps complete backup: Default checked.
Tricks:
1. If you forgot to check set “Automatic backup”, there are two way to add the backup settings during the test.
Make sure right click menu has “Automatic backup” option.

If not, back to the “Set---System settings---Display settings”, on the right click menu function, select the checkbox of the Automatic backup.

Then you can add the backup settings there.

You can click the “Cloud” icon on the right bottom of the software interface. The automatic backup settings window will pop-up. You can right click to add the backup setting of the channel that you forgot to set. Also, you can choose the backup record to view, modify backup setting of the channels.

2. If you have a lot of channels forgot to do the backup setting. You can add backup setting for one unit at the same time if the backup directory same. No need to set one by one. Input the Device ID and Unit ID.
